Setting up Google Analytics (GA4) tracking for your website is fairly straightforward but what about tracking a subdomain in GA4 or even a different domain altogether?
If you want to continue collecting data when visitors leave your main website to visit a third party website, for instance a catalogue, quiz form or booking platform, then you’ll want to make sure you set up cross-domain tracking in Google Analytics.
Similarly, if you have a subdomain that you want to track within the same Analytics property, you’ll need to ensure it’s set up correctly.
Here’s how:
STEP 1
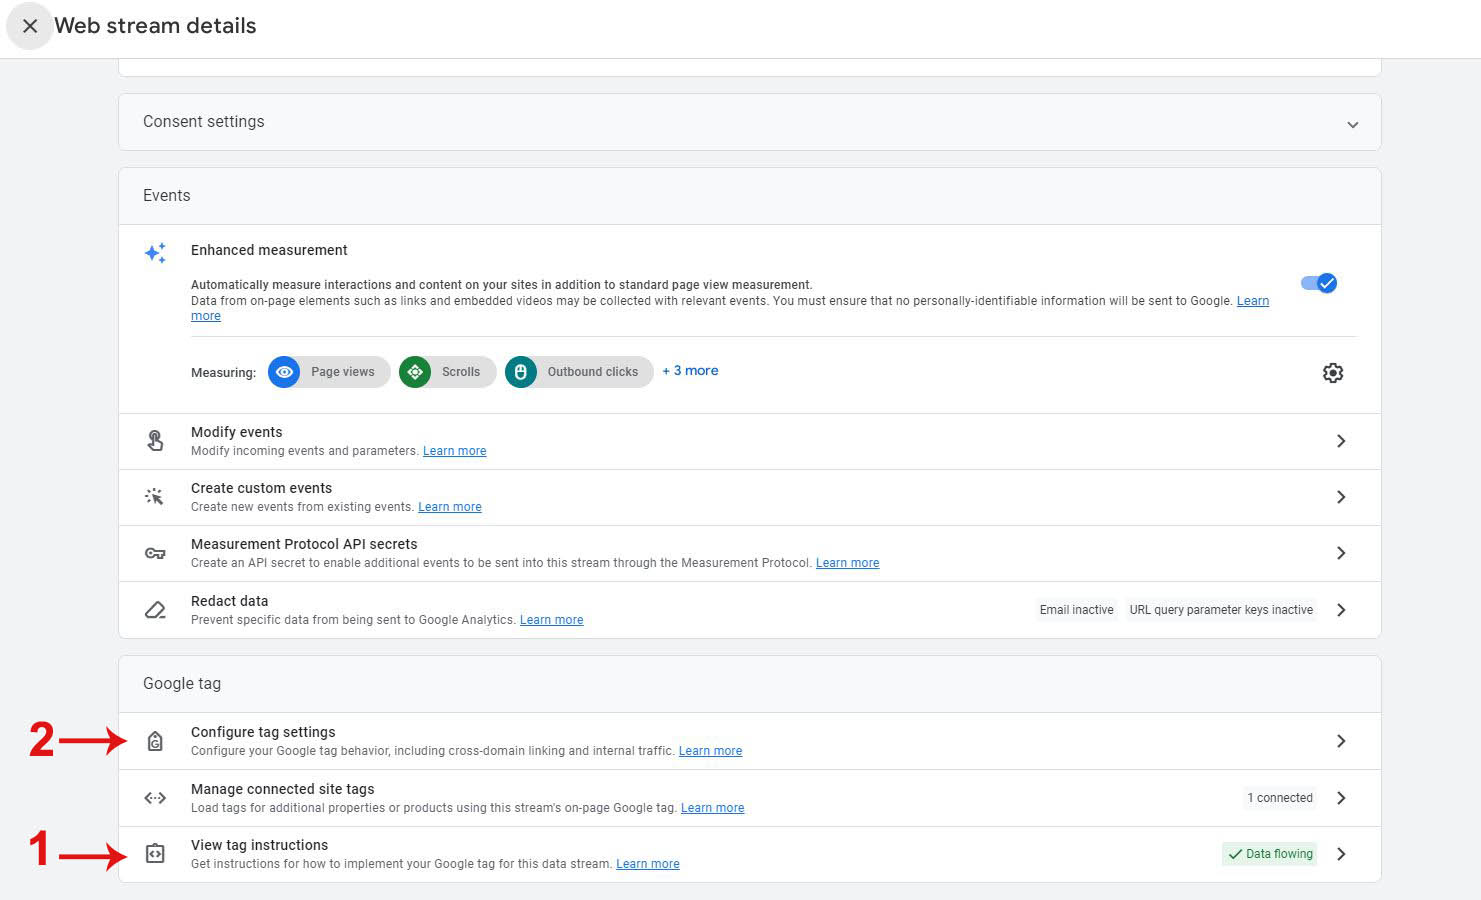
To track subdomains or to setup cross domain tracking, you’ll need to ensure that your Google Analytics property stream’s measurement ID (gtag.js) is firing on the pages that you want to track. So, just like you installed the GA4 code on your main website, use the same code on the others if you want to track and combine the data together. You can do this by installing the code manually by copying and pasting the Google tag code from GA4
Admin > Data Collection and Modification > Data Streams > Your Chosen Web Stream > (scroll to the bottom) View Tag Instructions
Alternatively, you can set the Google Tag through Google Tag Manager container. If you already have this set up, you just need to add the GTM container codes to your subdomain or third party domain.
If the subdomain or third party domain uses a CMS, you may decide to place the Google Tag using a plugin.
STEP 2
With the code in place and firing correctly, data will start to feed into your Google Analytics (GA4) property. However, to ensure Google Analytics doesn’t register the third party domain you’re tracking as an Outbound Click when users visit it from your website, you’ll need to set up cross-domain configuration.
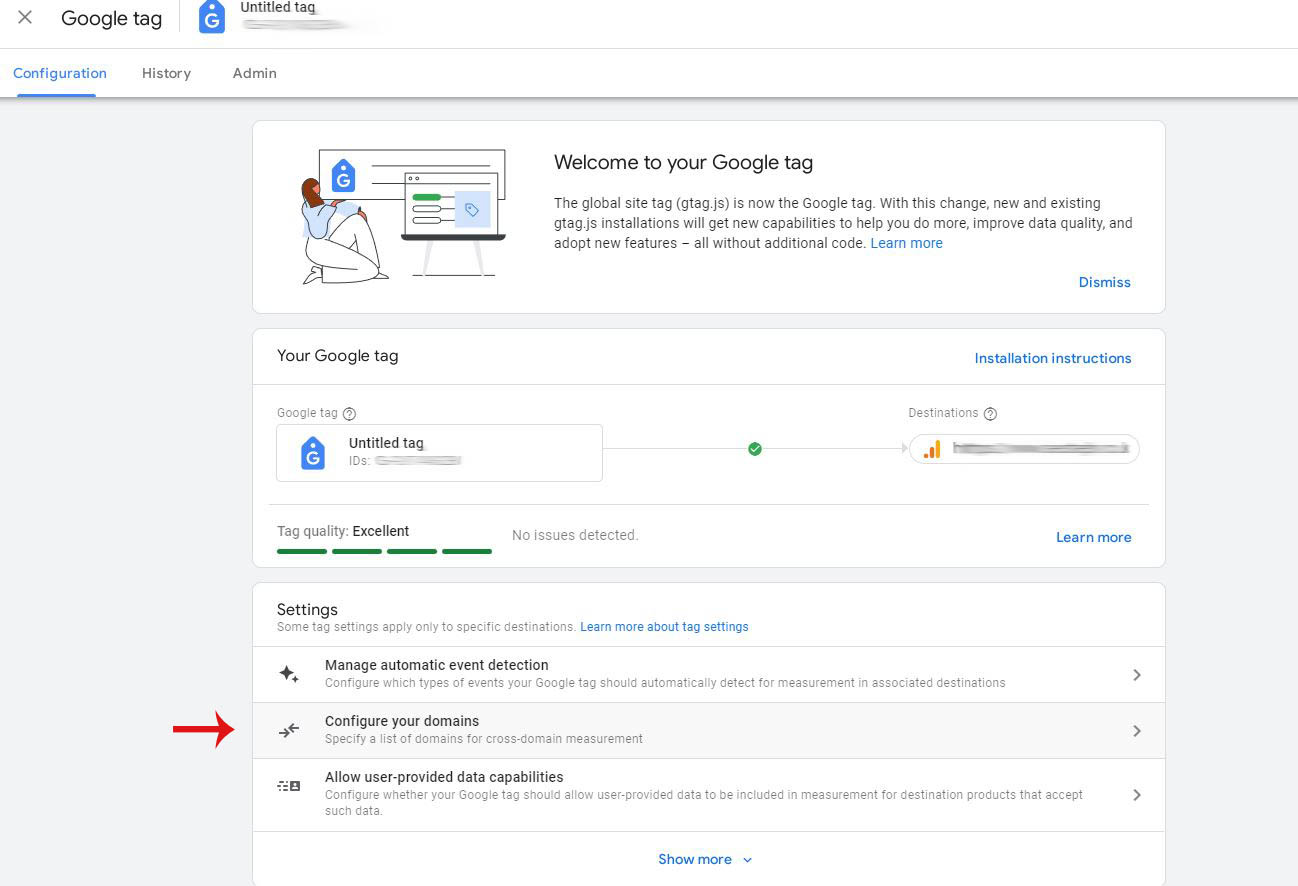
In Analytics, go to Admin > Data Collection and Modification > Data Streams > Your Chosen Web Stream > (scroll to the bottom) Configure Tag Settings > Configure Your Domains
Here you’ll be able to add the third party domains or specific pages you want to track as a continuation of your website. Just make sure that you use the dropdown options to help you to accurately configure the additional site or pages.
Viewing Subdomain and Cross-Domain Data in GA4
With data now feeding into GA4, you’ll be able to see visits to the subdomain or cross-domain pages within Google Analytics. However, to properly identify these pages, you need to use Page Location rather than Page Path.
Why? Because Page Path shows you the path after the domain, so the homepage is usually signified by a single trailing slash (/)
However, if people visit your subdomain or cross domain’s index page, they too would be represented by a standalone trailing slash (/)
This means that the data from all of the index/home pages of the domains being tracked using the same Google tag will be grouped under the / page path. This is a nightmare when trying to work out data for the separate sites.
So in order to understand which pages belong to which domain or subdomain, we need to see the full URL. This is accessed through the Page Location dimension.
You can find more about the difference between Page Location and Page Path in my guide.
Using Looker Studio To View Cross-Domain Pages
If you’re using Google’s Looker Studio to process your Google Analytics information, then you can simply use Page Location as your dimension.
However, if your Page Location has numerous query strings which are causing multiple instances of which is essentially the same URL, thereby muddying the data, then there’s a way in which you can remove the query string from the Page Location so your data is more accurately representing the pages with cleaner URLs.
All you need to do is, instead of using Page Location as the dimension, create a New Calculated Field on the Dimension section of your chosen chart table, and enter the following:
REGEXP_REPLACE(Page Location, “\\?.*$”, “”)
This will use the data from the Page Location field and strip the query string from the end. This new field will turn a page URL like:
https://www.example1.com/blog/?a=12345abcde
into
https://www.example1.com/blog/
Thereby grouping pages together without the strings causing them to be split into different URLs.
Customise the GA4 Report To View Full URL
When using GA4 to view the subdomain or cross-domain data, you’ll need to do some tweaking as it’s a bit more rigid out of the box.
If you like to use the Pages and Screens report in GA4, under Traffic or Engagement headers, then you’ll see that it has a dropdown you can use to switch from Page Path to Page Title. To add Page Location to this, click the pencil icon in the top right corner to customise the report.

Here, you’ll be able to adjust the report to your liking. On the right hand side there’s options where you can add and tweak the settings of the report. Click on Dimensions and click at the bottom Add Dimension. Scroll through the dropdown until you find Page Location. Once added, click Apply, and then the blue button at the top of the report that says Save. You can choose to overwrite the existing report or create a new one. As we haven’t changed anything, just added an extra dimension, I’d opt to overwrite it.
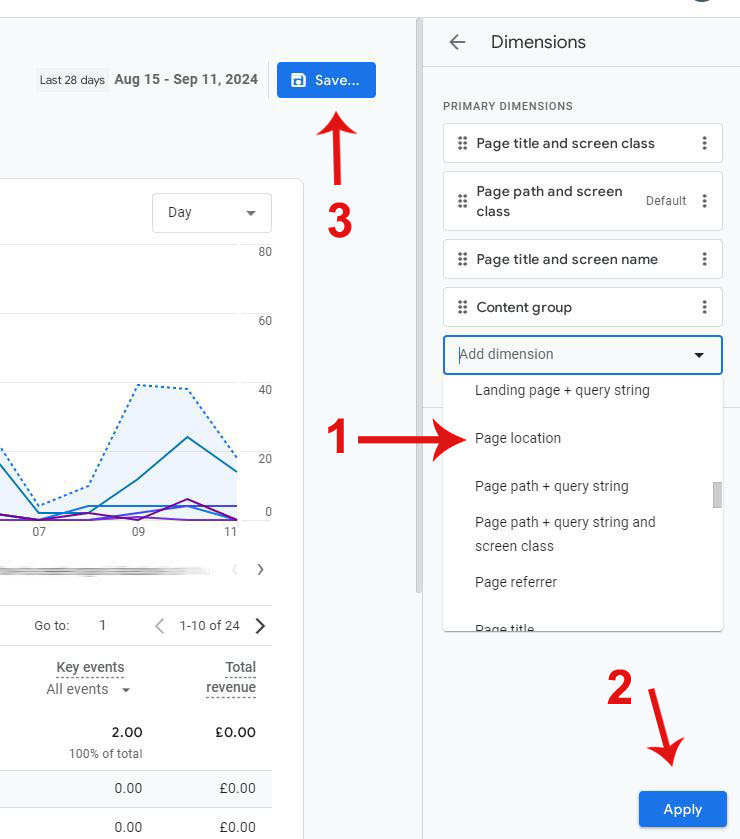
Once you’ve saved the report and exited back to the GA4 view mode, you’ll be able to go to that report and use the dropdown to select and list the pages by Page Location instead. If you find you use this dimension the most, in the Customise settings for the report where you added it, you can set Page Location as the default dimension instead of Page Path and Screen Class. Just click the three dots in the box to the right of Page Location and click Set As Default. Just make sure to Apply and Save after any changes you make to ensure it takes effect.
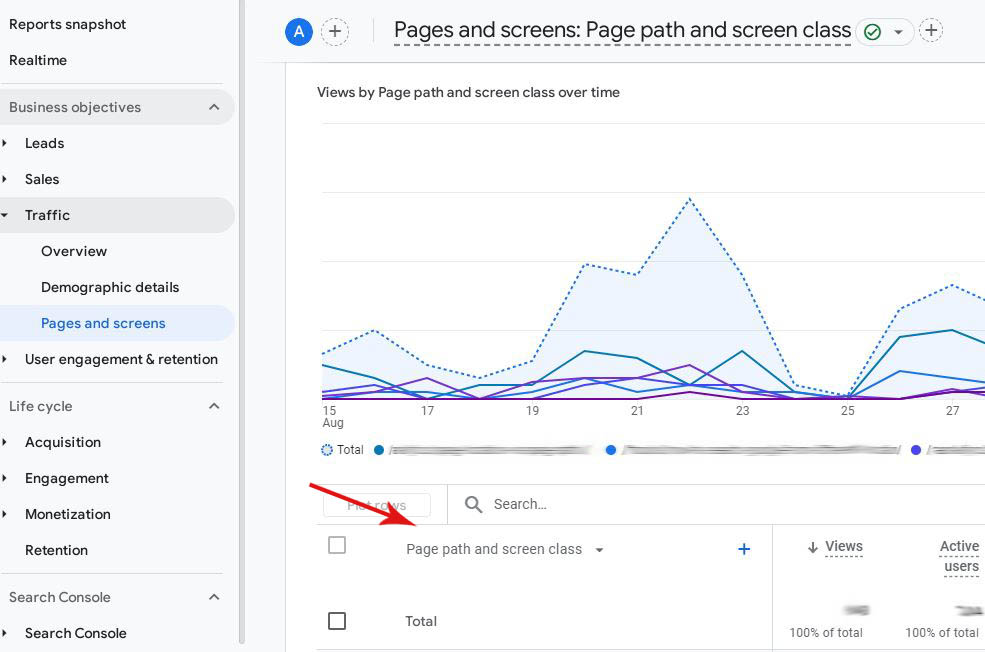
Once added to the report, you’ll be able to select Page Location from the dimension dropdown in the GA4 report you’ve customised.
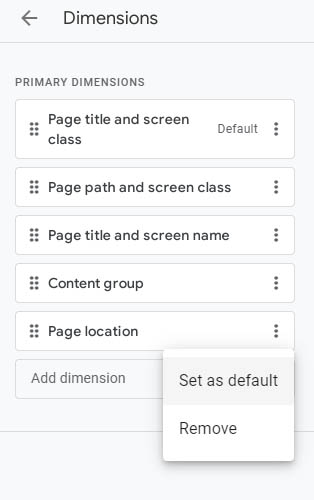
In Customise Report settings, you can make Page Location the default so it’ll be automatically selected every time you view the report, rather than having to use the dropdown.


0 Comments